Designing in PageMaker:Quick learn
PageMaker is an application software used as desktop publishing(DTP) in GUI based system. PageMaker was first introduced in Apple Macintosh system in 1985 by Aldus. Later in 1987 Pagemaker was also available in Microsoft Window OS. Publications created in PageMaker can be used in areas such as business, education, home-office etc. Its interface and various tools helps the user to create customized publication
Using pagemaker user can create publication such as brochure, business card, Invitation cards, ads,newsletter and more. Sometimes user can use the templates provided by the application for various publications.
Pagemaker software introducing in this post is Adobe PageMaker version 7.0(released in July 2001). InDesign is the successor of PageMaker
By designing a simple publication you can easily understand the interface of this application and can create lots of other DTP works, such as, wedding card ,invitation card, brochures,books, magazine etc., with PageMaker. So, lets get an introduction by making a simple visiting card
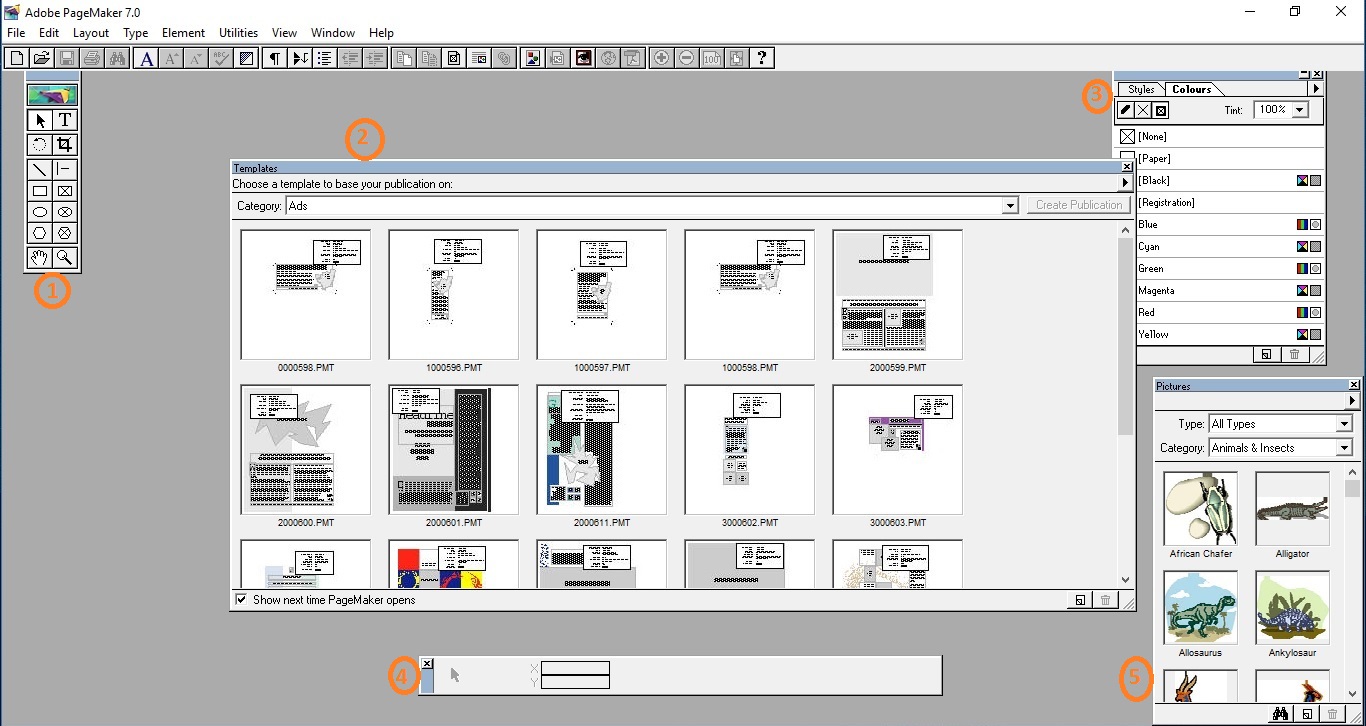
First open the application. Below is the window you will see first time
 PageMaker sartup window

Before going further lets get simple acquaintance with PageMaker Tool box. Check the different tools available in the toolbox.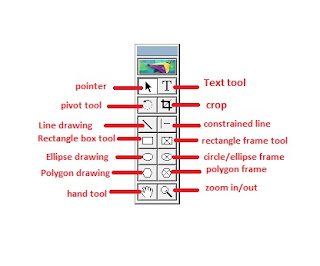

First open the application. Below is the window you will see first time
PageMaker sartup window
In start up window you can see the following things
 Menubar provides various menu and Toolbar provides quick selection frequently used menu items.
We are not using any template, so,close the Templates window. To create a new document, open File(or Alt+ f) menu and select New (or Just press ctrl + n) to open new document set-up window.
- Toolbox- various tools
- Templates window - provide various in-built designs to select
- Color palette - various color definition for publication
- Control palette- to control documents and elements(font,color etc) while designing
- Picture palette - allows user to add or remove picture into their publication
We are not using any template, so,close the Templates window. To create a new document, open File(or Alt+ f) menu and select New (or Just press ctrl + n) to open new document set-up window.
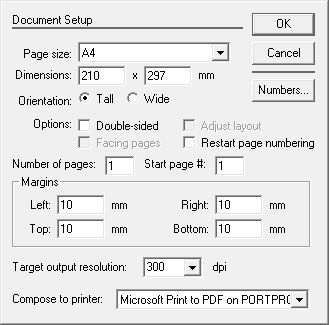
Document setup
Various fields in this window allows the user to setup their document as he/she needed. For designing a visiting card we require 3.5x2.0 incs(WxH) document. But, for printing purpose we should use A4 size document. Orientation Tall, uncheck double sided and facing pages we don't need them now. Make the 4 fields of Margins to zero. And, set the output to 72 dpi or 300 dpi.
And press OK
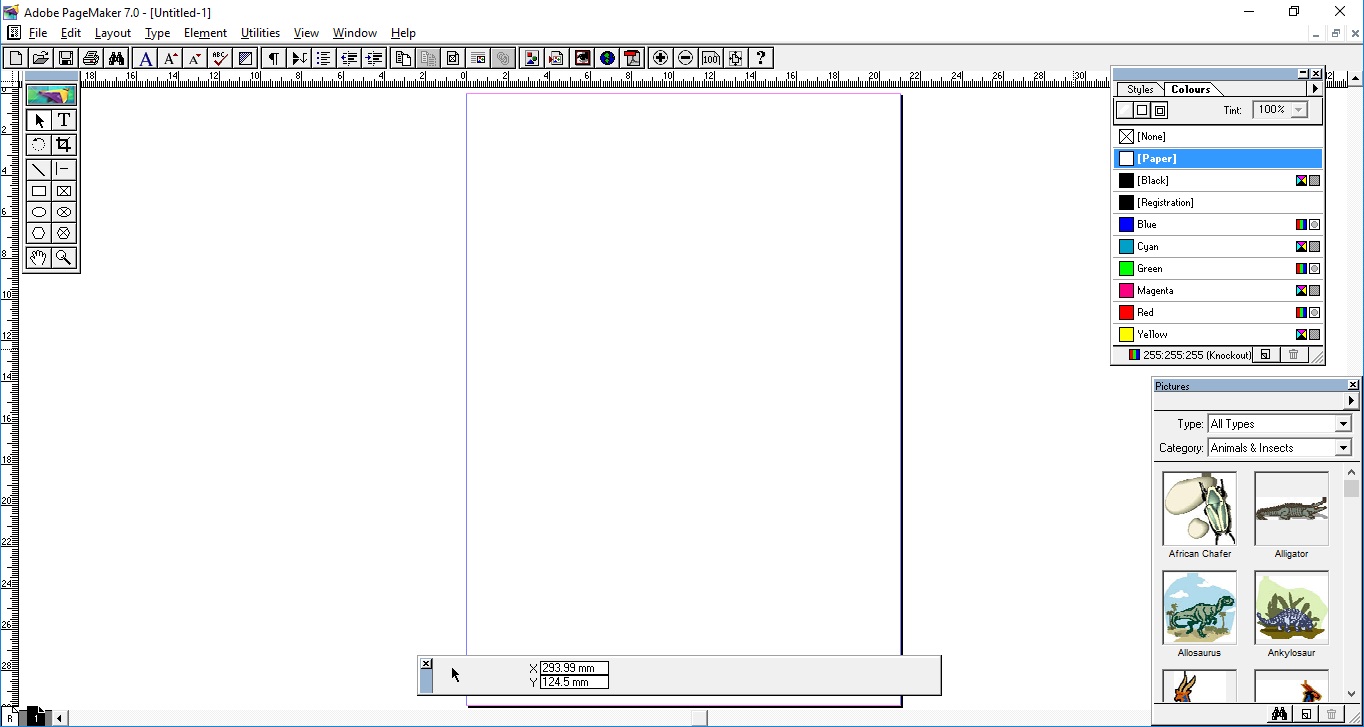
Now you get this window
Now you get this window
The document window
Before going further lets get simple acquaintance with PageMaker Tool box. Check the different tools available in the toolbox.
PageMaker toolbox provides various tools for user. Tool box contains the following tools : Pointer which is used to select the various elements of document/publication, pivot(rotate)used to rotate an object ,oblique line to draw line in any direction, rectangle box used to draw a boxed rectangle, ellipse box to draw a circle,polygon box to draw polygon,hand move used to move the document,Text to enter text in publication, crop used to crop images in publication, constrained line used to draw straight line, rectangle frame to draw rectangle frame, circle/ellipse frame to draw circle frame, polygon frame to draw polygon frame, zoom in/out zoom in to document to zoom out use this tool with control(Ctrl) button pressed on keyboard.
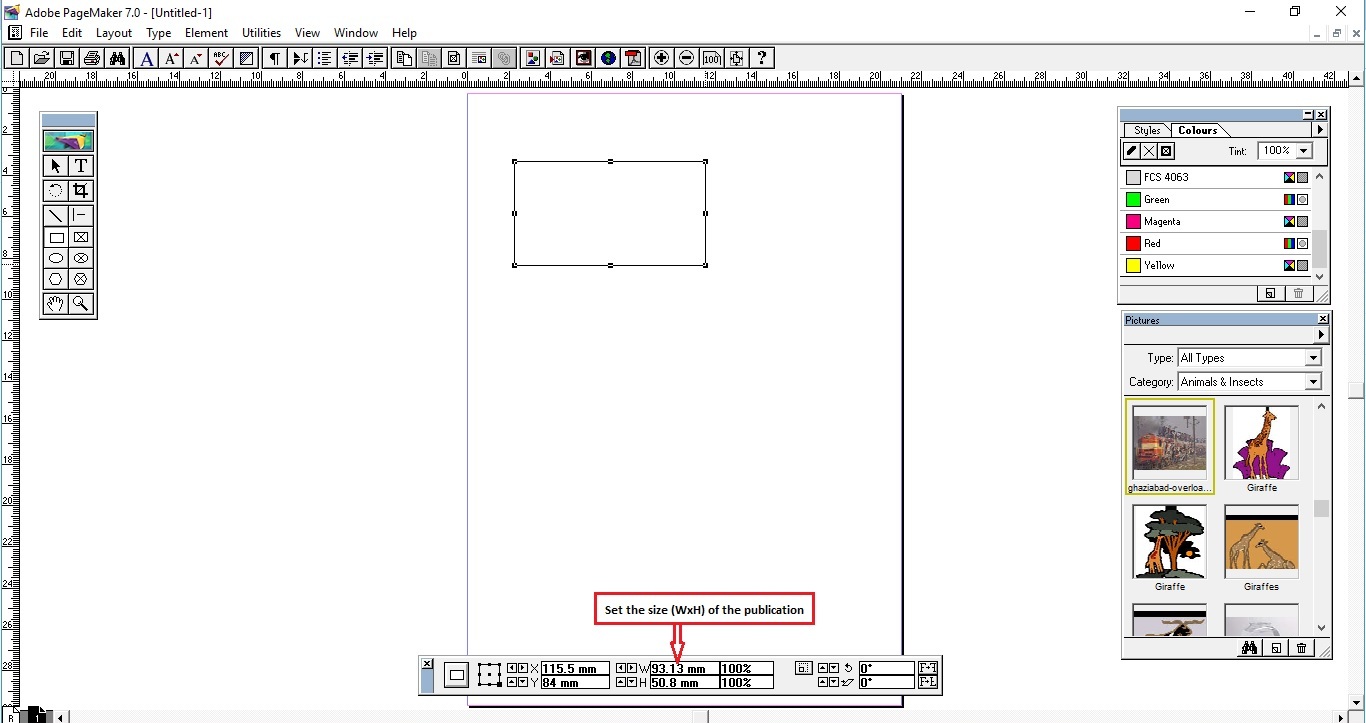
For designing the visiting card first we use the rectangle box tool. Select the tool and click and drag on the document to draw the box and use the control palette to set the size of the card.
See this figure to find how it is done
If you don't have the control palette you can enable by selecting Window menu and select the Show Control Palette. It is possible to move the palette to any place in your work-space. To move click and hold title of the control palette(the left most blue colored rectangle part ). Depending on the tools you selected the control palette shows the elements related to that context. For instance if you select the text tool then the control palette shows the text related elements such as font-style, font-size, color etc. If you select the pointer tool then the control palette will be like the image shown here:
In the mage you can see the selected tool is pointer and its current X Y coordinate position. So, select the rectangle box you just draw using the pointer tool Enter the value into the W and H(in=>inch or mm=>millimeter or cm=>centimeter) fields and press Enter key. Now, your document(visiting card) set to the size.
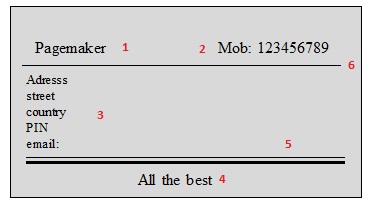
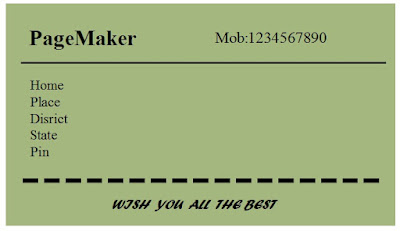
Now enter the matter into the document. Use Text tool to Enter the text into the document.Select the text tool and drag on visiting card rectangle area. Check the sample visiting card below for reference.
In this sample, the numbers from 1-4 are different text modules which create using Text tool. And 5,6 are lines created using constrained line tool. And, also, the background color grey has applied to it using color palette. You can use the Fill, Stroke, Fill and stroke function in Element menu to give the drawing figure additional styles. Check the line 5 in image which was created using constrained line and changed it style using Stroke in Element menu. Similarly you can change the background style using Fill item in Element menu. Don't forget to select the item using pointer tool, By making different modules you easily apply different effects and position each item on the publication. For instance in the case of this visiting card it contains mobile number, address, name. Name of person can be set big font size than address font size, set mobile number in italicized and position these item in proper place. See the sample above. Click here to see making visiting card step by step
Color palette
Look at the marked portion in the image: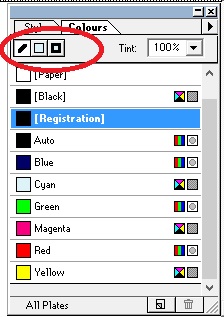
Changing the unit of measurement
In File menu select Preference and then General.
There you get the customization like below and select the unit in Measurement in:


Comments
Have you written a blog before? Working on a blog seems easy.
The overview of your website is pretty good, not to mention what it does.
In the content!
photoline-crack
adobe-pagemaker-crack
handbrake-crack
steganos-privacy-suite-crack
PhotoLine Crack
TeamViewer Crack
DJ Music Mixer Crack
PhotoLine Crack
TeamViewer Crack
After reading a few of the blog pieces on your website, we sincerely love the way you written.
crackbins.com Please visit my website and share your thoughts with us.
Steganos Privacy Suite Crack